World peace cookies

IMG_2881IMG_2879IMG_2878

If you´re well known in the cookie buisness, you might have heard of these. If not, let me introduce you. These cookies come from Dorie Greenspan´s “Baking – from my home to yours”. When I finally got my hands on this book, I was kind of overwhelmed. First of all by its size and weight (it was a gift) – it was enormous! And secondly, and maybe most importantly, by the number of recipes. (I guess I should have predicted that, given its size, but – well, what can I say…) The book doesn´t waste a lot of space or pages on pictures – which I normally don´t think is a waste – on the contrary, it´s what makes me want a cookbook, and what makes me purchase it. But here, I´m thankful the pictures are left out to make room for more recipes. After all, it was a struggle to get that book, as you can read here

But, when I was going to start baking, I had no idea where to start. I mean, where does one start with over 300 recipes? And almost without any pictures to tempt me? Hmm. One starts at google, of course! I searched for “best, or favourite recipes”, and after a little googling, there were a few recipes that seemed more popular than others. One of them were something called world peace cookies. (Another was Swedish visiting cake, so that´s next on my list!) A cocoa-cookie with sea salt and chocolate chunks. Well, that didn´t exactly put me off! Though, normally I like my cookies non-chocolate. That is, without cocoa in the batter. But not completely without chocolate! Hell no! Bring on the chocolate chunks! But, I decided to have an open mind. So many people can´t be wrong. And it´s not like I dislike chocolate cookies, they´re just not my favourite. Until now.

IMG_2894

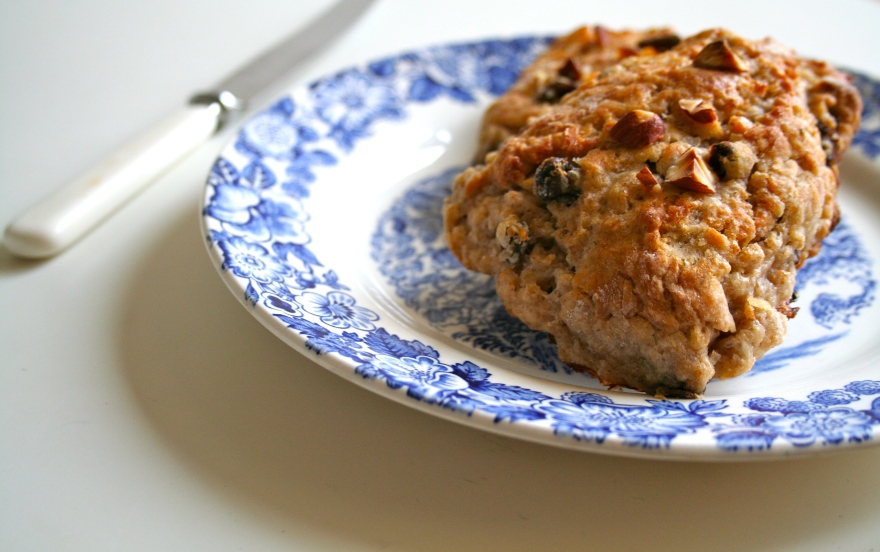
I made these for the first time a while ago, but they turned out butt ugly, delicious though, but not to be broadcast worldwide. Sorry guys, I´m shallow. These turned out better. And I know what you´re thinking: They´re not that good looking. And seriously, can they be that good? Isn´t it just another cookie?
No – it´s not. It´s a cookie, yes, but it´s a really, really good one.

The taste is rich and very chocolatey. It´s enhanced by the addition of sea salt. Oh chocolate and sea salt. How I love you two together. And my photos don´t really do them any justice, and that´s not just because of my lack of photo-skills, it´s because any photos of these cookies can´t show how yummy-tasty they are! Appearantly these cookies got their name, by Dorie’s neighbour who thought that a daily dose of these cookies would be enough to instigate world peace. Well, I don´t know about that. I see his point, but on the other hand, these cookies might as well start a world war. You get the point: They´re good.

World Peace cookies

1 1/4 cups (175 grams) all-purpose flour
1/3 cup (30 grams) unsweetened cocoa powder
1/2 teaspoon baking soda
1 stick plus 3 tablespoons (11 tablespoons or 150 grams) unsalted butter, at room temperature
2/3 cup (120 grams) (packed) light brown sugar
1/4 cup (50 grams) sugar
1/2 teaspoon fleur de sel or 1/4 teaspoon fine sea salt
1 teaspoon vanilla extract
5 ounces (150 grams) bittersweet chocolate, chopped into chips, or a generous 3/4 cup store-bought mini chocolate chipsWhisk flour, cocoa powder, and baking soda into medium bowl.

Using electric mixer, beat butter in large bowl until smooth and creamy. Add both sugars, vanilla, and sea salt; beat until fluffy, about 2 minutes. Add flour mixture; beat gently just until blended (mixture may be crumbly). Add chopped chocolate; mix just to distribute (if dough doesn’t come together, knead lightly in bowl to form ball). Divide dough in half. Place each half on a sheet of plastic wrap or parchment. Form each piece into 1 1/2-inch-diameter log. Wrap each tightly and chill until firm, about 3 hours. (Note: this can be done in advance – logs can be stored in the fridge up to three days before slicing and baking).

IMG_2886

Preheat oven to 325°F. Line baking sheets with parchment paper. Using a sharp knife, cut logs crosswise into 1/2-inch-thick rounds. Space cookies 1 inch apart on prepared sheets. Bake 1 sheet at a time until cookies appear dry (cookies will not be firm or golden at edges), exactly 12 minutes. Transfer to rack and cool before enjoying with a large glass of milk.

Makes 20-22 cookies.

IMG_2884

IMG_2892

Whole grain scones with raisins & walnuts

IMG_8496

IMG_8507

Scones! Gotta love´em! I know I do. I´ve said it before, and I´ll say it again: I love scones! I´m not afraid to admit it. It´s a fact, it´s a thing I can´t deny, like the fact that I will love them till I die… Ok – you get the picture.

Why this love of scones you say?
Well first of all – they taste amazing, but secondly, and maybe most importantly, you can start baking and get to the eating-part within 30 minutes! Unlike their yeasty relatives… And may I add that there´s absolutely no kneading involved! Only slight stirring, and even barely so. Which means you don´t have to wait for the dough to rise or to evolve to another stage, which again means there´s no disappointments when your dough doesn´t behave like it´t supposed to. No, no. None of that. Scones are grateful little creatures. At least compared to their yeasty cousins, which seem to live a life of their own. And that can be interesting at times, but other times, you want to be in charge, you want to be the master in your own kitchen. And then, my friend – scones are your friends.

And, like many other things I guess, you can play around with them, mixing them up with different kinds of flour or addings to suit your liking that day. You can go all in with full cream, butter and sugar and chocolate, or you can add berries or fruits for freshness, or you can substitute some of the ingredients to make a sweet, yet slightly healtiher scone. That´s what I intended to today. Sweet – yes. Always sweet to suit my sweet tooth, but also trying to make them a little less fatty and sugary, so that I can gobble on more of them, and eat them like a sweet substitute for bread.

IMG_8499

IMG_8503

Like I may have mentioned before, I´m on an everlasting search for a scone recipe that will resemble, or ideally copy – (but I don´t aim that high any longer) – the scones from my time working at the Lie Nielsen bakery. And judging by the photos, and list of ingredients, these seemed to be fitting.´ve actually made these once before, but that was a long time ago. I couldn´t really remember how they turned out last time – so it was time to make them again! It was my turn to bring baked goods to my sweet-loving health-concernded classmates this week, and what opportunity could be more appropriate? The recipe is from a book from the Norwegian bakeri Åpent Bakeri. I don´t really know the bakery, since it´s based in Oslo, but from what I´ve heard, it´s one of the best. And their scones are no exeption… And neither are mine – if I dare say so!

Scones (adapted from Åpent Bakeri)
– yield 8 decent sized scones

115 g sugar
100 g butter
1 dl buttermilk or greek yoghurt
2,5 dl milk
375 g flour (I used about 200 g wheat, and 175 whole grain – a mix of spelt/rye flour)
25 g baking powder
50 g walnuts
75 g raisins

The day before baking, soak the raisins.
(Or at least for a couple of hours – if your scones-cravings are urgent!)
Drain the raisins, then set them aside on a paper towel to soak up any external moisture.

In a large mixing bowl, beat together butter, yoghurt and sugar. Add the (sifted) flour and baking powder mix in stages, then knead lightly till it is smooth and elastic in texture. Slowly add the milk while beating, and stir the mixture till it is smooth and lump-free (don’t worry if it appears curdled, mine did and my scones still turned out beautifully!) Carefully stir in the soaked raisins and walnuts, then shape the dough into a ball. (Be careful not to over-stir! The less you do the better – You just want the dough to hold together and be somewhat lumpfree) If the dough turns very wet, add a little more flour.

Place on a lightly floured surface and pat into a 7- to 8-inch circle about 3/4-inch thick. Sprinkle withe chopped almonds. Use a sharp knife to cut into 8 triangles. I like to pull them apart too, just to make sure they bake more evenly. Place on a cookie sheet (preferably lined with parchment paper), about 1 inch apart. Bake until golden, about 15 to 17 minutes. Cool for 5 minutes and serve warm or at room temperature with butter. Simple as that! And that´s why I love scones!

IMG_8491

Chocolate cake for 2012

Happy new year everyone!
How was you new year´s eve? Full of festivities, celebrations, good friends and good food? Well – in that case, it was the opposite of mine. No, I´m not complaining, I actually had a great new years eve, it just didn´t turn out exactly as planned. But many good things in life happen by accident! Not that anything actually happened around here. Quite eventless, is a good way to describe the last day of 2011. We woke up quite late, or extremely late, to be accurate. We had spent the night at my parents after enjoying our christmas present for them, which was a basket full of quality cheeses, sausages and ham. Sneaky? Nooo… It was noon when we had our breakfast, but in our defense we slept really bad that night, or hardly at all. By this time our plans for the night were a little uncertain, since my sister had cancelled our original plan. Usually we spend new year at their house along with another couple, and me and my boyfriend are in charge of turkey (him) and cake/dessert (me – surprise!) So the turkey was alredy bought and I had my eyes on a certain cake. We thought of inviting some other people, as a 5-kilo turkey is slightly too much for two people, but as I was feeling a cold developing too, we decided that it would be best to take it easy. Low key-new years eve was our plan! And that plan, my friends, worked out indeed. Did you know you could watch the fireworks on tv? You don´t even have to get up from the sofa. Just place the food in front of you, enjoy the meal from the sofa, have a few films laid out, and you´re good to go! Well, we actually sat down by the dining table to eat – turkey deserved that, after all. But if we had planned this, we would probably go all the way with homemade pizza, and pizza, as you know, is best enjoyed from the sofa, in front of the tv. Well well, maybe next year! Or this year, actually.

The fact that we were going to have a 5 kilo turkey for dinner that night, didn´t stop me from making the cake I planned to bake for 8 people. You could think that a big dinner was enough, but I say a big dinner deserves a big dessert. Or to be honest, I´d be making this either way, no matter the size or shape of dinner. No way I´d let a New Years eve pass without cake! Unheard of! Oh no, I was making this cake. I couldn´t let it pass even if I wanted to, the pictures of it would haunt my dreams until I made it. I found the recipe via Tastespotting, on a random search for chocolate cake. And this appeared. I rest my case. Who can look at this and not make it? Certainly not me. I wasn´t going to let sickness and a 5 kilo turkey get in the way of me and this cake. So I made it. And I suggest you do the same…

Moist Chocolate Cake (Foodess.com)

2 cups sugar
1 3/4 cups flour
3/4 cup cocoa
1 1/2 tsp baking powder
1 1/2 tsp baking soda
1 teaspoon salt
2 eggs
1 cup buttermilk
1/2 cup butter, melted
1 tbsp vanilla extract
1 cup hot coffee (or 2 tsp instant coffee in 1 cup boiling water, or simply 1 cup boiling water)

Preheat oven to 350 degrees. Grease two 9-inch baking pans and set aside. In the large bowl of a standing mixer, stir together sugar, flour, cocoa, baking powder, baking soda, and salt. Add eggs, buttermilk, melted butter and vanilla extract; beat 2 minutes on medium speed. Stir in hot coffee. Pour batter evenly between the two pans and bake on middle rack of oven for 30 to 35 minutes, until toothpick inserted in centre comes out clean. Cool completely on wire racks before frosting.

The cake turned out beautifully and tasty. The flavour was so rich and chocolatey. I was a little surprised by that, since there weren´t any chocolate, just cocoa powder. But I guess that´s what made that deep rich flavour. But…it didn´t turn out as moist as I´d imagined. I´d probably be perfectly happy with it, if I hadn´t seen those pictures of that insanely moisty fudgy cake. But I had. I think I know what did it, though. I didn´t add all the coffee, as I didn´t bother to brew more than I already had, (yeah, yeah, the lazy chef strikes again!)so the batter wasn´t as runny as supposed to. And I guess a runnier batter will make a moister cake, or what? I think that has to be it, cause I followed the recipe otherwise! Next time – cause there´ll be a next time, many next times – I´ll follow the recipe closely. And maybe subsitute some of the cocoa for chocolate? And definetely make more frosting. It´s a big cake, it needs its frosting. Especially to cover up for lacking moistness. Oh yeah, I´ll be making this over and over until perfection strikes! This recipe is a good starting point!

Panna cotta with spiced apples

This is one classy dessert! Wow, I impress myself… I’m usually the more rustic, rough looking kind of desserts or food in general, so when I make that little extra effort, which actually is really little, I feel so proud. So of course I’m sharing it with you today!

I had this lovely dessert a couple of weeks ago at a friends house. We’ve started a little dinner-group, where one is hosts a 3 course dinner, and the rest bring the wine. It’s great fun, and a nice way to try new dishes, like this one. The appetizer was really good, so was the dinner, but we all agreed that the dessert was the highlight of the meal. And it looked quite fancy too. Like the dessertmaniac I devored it. I haven’t had that much panna cotta in my life, and the few times, I’ve found it a little boring. But this was perfectly paired with the spiced apples which balanced the neutral flavour of the panna cotta. Delicious. From that moment I was a panna cotta convert. I got the recipe, and now that I’m home on vacation, what better way to start off my days of freedom, and to finish off my first meal at home with my boyfriend, than with this fine thing? I believe the boyfriend was impressed. Like always, he’s in charge of dinner, and I’m the queen of desserts. And now I’ve added this to my repertoire! It’s nice to get some outside inspiration, cause I tend to get stuck in my old habits and food routines, but I’ll definetely be making this again! I actually think I’ll add it to my book of recipes… And that, is a sign of quality.


Panna cotta with spiced apples (4)

2 leaves of gelatine
1 vanillapod
1½ dl full cream 38%
5 tablespoons sugar
3 dl sour cream 9%

2 apples
3 tablespoons sugar
½ dl water
1 staranis
1 stick of cinnamon(4-6 cm)
½ ts ground cardamom

Soak the gelatine in cold water for 10 min. Cut the vanillapod and scrape out the seeds. Pour cream, sugar, vanillapod and seeds in a small pan, and bring to a boil while stirring. Remove pan from heat. Remove the gelatine from the water, and put it into the warm cream mixture. Stir til everything is dissolved, and pour in the sour cream. Divide the panna cotta in 4 glasses (a ca. 2 dl) and cover in the fridge for at least 4 hours.

Spiced apples: Peel the apples and slice them thinly. Melt the sugar in a pan. Add water, staranis, cinnamon and cardamom and boil for about 2 minutes. Put the apples in the pan, and boil over low heat while stirring for about 4 min. Allow to cool completely.

Divide the apples onto the pannacottas and serve immediately.

Lemon cookies

It’s Christmas. It’s cookie time.
Let’s get down to business.

I’ve already made a batch of gingerbread. They turned out well, but they also turned out to be many. I brought one jar to school, now there’s only two back. And at the time, it’s just me. So I’m munching gingerbread, and I’ll be doing that for some time. But nevertheless, I feel the urge to bake some more cookies. Just something else. Something lighter (if you can say that about any cookie) and maybe a little less Christmasy. I found what I was looking for. Even though I’m very traditional when it comes to Christmas – cookie wise anyway – I know there’ll be plenty of that, so why not try something else? It’s still a cookie. So it has a some Christmas to it.

The cookies are lemon and lime flavoured sugar cookies. I found the recipe at joythebaker, but originally it’s from Baking from my home to yours, (I crave that book! I’ve found so many recipes from that book on various blogs, and they’re all so great. But it’s not available here…) and I knew I had to make them rightaway. And so I did…

I didn’t have any lime, but that didn’t stop me as I had a ton of lemons. I just skipped the lime part and added some more lemon instead. And that worked out fine. But I guess the lime would make that little extra je ne sais quoi… Great cookies anyway! Go bake!

Citrus Sables

2 sticks (8 ounces) unsalted butter (preferably high-fat, like Plugra), softened at room temperature
1/2 cup granulated sugar
1/4 cup confectioners’ sugar, sifted before measuring
1/2 teaspoon salt, preferably sea salt
2 large egg yolks, preferably at room temperature
2 cups all-purpose flour.

zest of 1 lemon and zest of 1 lime

For the decoration (optional):
1 egg yolk
Crystal or dazzle sugar.

1. Beat the butter at medium speed until it is smooth and very creamy. Rub the zest of the lemon and lime into the granulated sugar with your fingertips, creating a fragrant sugar. Add the sugars and salt to the butter and continue to beat until smooth and velvety about 1 minute. Reduce the mixer speed to low and beat in 2 egg yolks, again beating until well blended.

2. Turn off the mixer, pour in the flour, drape a kitchen towel over the mixer and pulse the mixer about 5 times at low speed for 1 or 2 seconds each time. Take a peek; if there is still a lot of flour on the surface of the dough, pulse a couple of more times; if not, remove the towel. Continuing at low speed, stir for about 30 seconds more, just until the flour disappears into the dough and the dough looks uniformly moist. If you still have some flour on the bottom of the bowl, stop mixing and use a rubber spatula to work the rest of it into the dough. You want to work the dough as little as possible. What you’re aiming for is a soft, moist, clumpy dough.

3. Scrape the dough onto a work surface, gather it into a ball and divide it in half. Shape each piece into a smooth log about 9 inches long (it’s easiest to work on a piece of plastic wrap and use the plastic to help form the log). Wrap the logs well and chill them for at least 2 hours. The dough may be kept in the refrigerator for up to 3 days or frozen for up to 2 months.

4. When ready to bake, center a rack in the oven and preheat the oven to 350 degrees. Line a baking sheet with a silicone baking mat or parchment paper and keep it at the ready.

5. To decorate the edges of the sables, whisk the egg yolk until smooth. Place one log of chilled dough on a piece of waxed paper and brush it with yolk (the glue), and then sprinkle the entire surface of the log with sugar. Trim the ends of the roll if they are ragged and slice the log into 1/3-inch-thick cookies.

6. Place the rounds on the baking sheet, leaving an inch of space between each cookie, and bake for 17 to 20 minutes, rotating the baking sheet at the halfway point. When properly baked, the cookies will be light brown on the bottom, lightly golden around the edges and pale on top. Let the cookies rest 1 or 2 minutes before carefully lifting them onto a cooling rack with a wide metal spatula.

I decided to give them a little extra decoration, dress them up to be suitable Christmas presents. A nice frosty look to complement the sweetness. I made an icing from icing sugar, lemon juice and a little water. I love lemon-flavoured icing together with lemon-stuff! It’s so…..lemony! So these were right up my alley. But they’re delicious on their own, so it’s not needed at all. Plain, they would be the perfect accompaniement to a cup of your favourite tea, any day of week. But I made them festive and ready for Christmas. And they turned out quite pretty, I think. Don’t you?

Oreo peanutbutter chocolate torte

I cannot tell you how long I’ve been dreaming about this cake. When it first appeared to me, I was what you could call cake-struck. I mean, just take a look at this. It looked sooo good, and was immediately bookmarked on my baking-list. 10 syllables titles are always a good sign. But I began to realize that it would be a little too much to throw together on a regular weekday, just because of a sweet craving. It was even too much for a weekend dessert – after all, there are just 2 of us in this household. And though we’ve eaten our way through entire cakes before, this was different. Just a quick look at the ingredients, (32 oreos, 2,5 cups heavy cream, 350 g cream cheese and 1,5 cups peanut butter….to name some) I knew 2 things about this cake. 1: this had to be good. I mean, oreos, peanut butter, sugar, cream cheese and chocolate – how could so many calories possibly fail? and 2: this was a cake for special occacions and more than 2 people.

So it was put on hold. For a long time. The right occasion never seemed to appear. Until now! New Years Eve! What better day for some cake-extravaganza? Maybe I should have opted for something lighter after dinner, but screw that, I was making this cake while I had the chance. If not now, when would I ever make this cake? Well my birthday I guess, but that’s far away, and this had been put off for far too long already. Finally, I would be making the delicious oreo-peanutbutter-torte that I first set my eyes on at annies-eats, but originates from Dorie Greenspan’s Baking From My Home To Yours. (Which I’ve tried to purchase online, but seems impossible as Amazon will not ship this book to Norway, so I guess I have to travel myself to the US, go to a bookstore, purchase this book, and return. Unless anyone out there will help me getting this cookbook?) Until then – I always have the internet. Here’s the recipe!

Chocolate Peanut Butter Torte

For the crust:
32 Oreo cookies, finely processed into crumbs
5 1/3 tbsp. unsalted butter, melted and cooled
Small pinch of salt

For the crunch:
1 1/4 cups salted peanuts, finely chopped, divided (for the filling, crunch and topping)
1/2 cup mini chocolate chips
2 tsp. sugar
1/2 tsp. espresso powder
1/4 tsp. ground cinnamon

For the filling:
2 cups heavy cream
1 1/4 cups confectioners’ sugar, sifted
12 oz. cream cheese, at room temperature
1 1/2 cups creamy peanut butter (not natural)
2 tbsp. whole milk

For the topping:
1/2 cup heavy cream
4 oz. bittersweet chocolate, finely chopped

(I would maybe increse the amount of oreos- yes, really- as I found it a little hard to cover the sides completely. And I think I would leave out the cinnamon next time, I don’t think that flavour blended well together with the rest. But that’s just my humble opinion.)

Directions

Preheat the oven to 180 C/ 350 F. Combine the oreos, salt with melted and cooled butter. Crush everything together until it resembles small crumbs. I found it best to put the oreos in a plastic bag and go at it with a rolling pin! When you’re done, press everything into a springform pan covering the bottom and the sides. Freeze the crust for 10 minutes, then bake in a preheated oven for 10 minutes. Cool on a wire rack completely before filling.

To make the crunch, combine everything in a bowl, but using only 1/2 cup of the chopped peanuts. Toss with a fork to mix, and set aside.

To prepare the filling whip 2 cups of the cream until it holds medium peaks. Beat in 1/4 cup of confectioners’ sugar and whip until the cream holds medium-firm peaks. Scrape the cream into a separate bowl and refrigerate until needed.

Wipe out (do not wash) the mixer bowl, replace the whisk with the paddle attachment, and beat the cream cheese with the remaining 1 cup of confectioners’ sugar on medium speed until the cream cheese is satiny smooth. Beat in the peanut butter, whole milk, and 1/4 cup of the chopped peanuts until well combined.

Using a large rubber spatula, gently stir in about 1/4 of the whipped cream just to lighten the mousse. Still working with the spatula, stir in the crunchy peanut mixture, then fold in the remaining whipped cream. Scrape the mousse into the crust, mounding and smoothing the top. Refrigerate for at least 4 hours or overnight. (Eventually put it in the freezer for a frozen version, or to speed the freezing process, as I did.)

To finish the torte, put the chopped chocolate in a heatproof bowl set over a saucepan of simmering water. Leave the bowl over the water just until the chocolate softens and starts to melt, about 3 minutes; remove the bowl from the saucepan. Bring the 1/2 cup of cream to a full boil. Pour the cream over the chocolate and, working with a rubber spatula, very gently stir together until the ganache is completely blended and smooth.

Pour the ganache over the torte, smoothing with a metal icing spatula. Scatter the remaining peanuts over the top and chill to set the topping, at least 20 minutes. When the ganache is firm, remove the sides of the springform pan. Refrigerate until ready to serve. Or you can freeze it and thaw in the fridge a few hours before serving. I decided to give mine a little freeze as I think it’s much easier to slice when frozen – besides, I like slightly frozen cakes. Either way, it’s delicious. Satiny smooth mousse like or the colder version; snickers ice cream-torte, only with added oreos! You have to try this some time. I know I’ll be making this again! This is what I call cake. Or torte. What’s the difference anyway? Who cares. Capitol C, capitol A, capitol K, capitol E. CAKE. Cakealicious is what this is. Or torte. This is confusing. Next subject, please!

Unfortunately I didn’t get to photograph it until today. I forgot to bring my camera on New Years Eve, but luckily there was a lot cake left. That much that me, my mother and my sister each got 1/4 cake to share with our respective men… So needless to say, today, 3 days later, after spending too much time in room temperature plus travelling around the city, through the snow, beeing sliced and shared, it lost some of it’s glory. But not its taste. So don’t judge by it’s slightly messy apperance! Make this cake as soon as you get the chance – you will regret if you don’t. Be realistic and have only this new year’s resolution – make this in 2010.

Merry Christmas everyone

So, the day we’ve been anticipating and preparing for for days, weeks and months, is finally over. It’s all so strange, I think. All that work we put down in baking, buying presents and carefully wrapping them, ends in one day. Well, I know Christmas isn’t only Christmas Eve, but that is the main part after all. I always feel a little empty when it’s over, but it only lasts for a little while, and then I realize there are more days off work to wander around the house in comfy clothes, eating cookies and candy, and go for a walk to get some air and work up some appetite for next meal!

Christmas was perfect. I celebrated with my parents, my two sisters, my brother in law, my overly cute niese and my grandmother. And we had a white snowy Christmas, which is not the case every year. And I got a lot of nice things, many food-oriented items, of course. I’m a foodie, after all. So here’s some of it:

1: Turron and nougat-ish chocolate from Spain. My sister is currently studying in Valencia, and brought home these delicious sweets. I know it’s good, cause my other sister has been living in Spain and introduced me to this. So thanks sis!

2: Gingerbread cutters and porcelain pie form. I wished for gingerbread cutters and got what I wanted. 3 sets of cutters… So I should be more than ready for next Christmas! The pie pan I got from my mother in law, and I know that will come in handy as I looove pie – in any shape. And I only had a small one from before.

3: Crème brulée kit; including heart-shaped ramekins, a blow torch and gas. Crème brulée here I come!
Thanks sis! (my other sister)

4: Tea, Cinnamon-flavoured coffee and pepper & chili jelly! Also from my little sister.

I also got a toaster from my mother and exclusive chocolate from my best friend! All in all, great presents!

Vørterbrød (Wort bread)

Vørterbrød is the Norwegian name for wort bread, apparently. I really didn’t know how to translate this, or what to call this bread, until now, that I found a definition of what vørter beer, one of the main ingredients, is.

Vørter beer (wort beer) is a non-alcoholic, unfermented drink produced through the carbonation and sterilisation of wort made from malt, hops and water. It is thus, per definition, not a beer and should not be labelled beer, but was given a dispensation to this in the Norwegian Beer Act of 1912 regarding production and taxation of beer. The reason for this is found in the history of Vørter beer.

Vørterbrød is a type of the traditional Christmas bread with raisins like panettone, stollen and other variations that seems to be part of many different Christmas cuisines around the world. Here in Norway there are two kinds: Christmas bread and wort bread (or cake, as some call it) The Christmas bread is made of wheat, raisins and sometimes succades.

Wort bread, one the other hand, is made of part wheat, part rhye, raisins and spices like anise, ground cloves, cinnamon and pepper. All good Christmas things into one. It has a much richer taste, and maybe it takes some getting used to, because it tastes a lot more than the ordinary Christmas bread. More spices, more syrup, more dense, more of everything and a lot better in my opinion! I love it. And the smell…..Oh, the smell. Lovely licorice-like and a dark brown colour from the rhye and the syrup.

You have to try it. Warm thick slices straight from the oven with a thick layer of good quality butter. Or a slice of Norwegian brown cheese – gjetost, if you’re into that. I’m not, but a hear this is the perfect combo. Well, what do you know. I’m back from my divine lunch, and I have a confession to make. I’m a brown cheese convert. That wasn’t bad at all. It was delicious. I, a non-brown cheese eater, can recommend brown cheese on wort bread. It’s delish. The bread is quite spicy, well not spicy, but filled with spices and flavour. And the cheese is very sweet, so together: A match made in Christmas heaven.

I found a recipe on the net that I was going to use. For some reason, I started to flip through the pages of one of my breadbaking-cookbooks from the bakery Åpent Bakeri, and found a recipe there. To simplify, meaning not having to write down the recipe from the net or dragging the computer into the kitchen, I decided on this recipe instead. And when the dough was done and I was done kneading, it hit me: The wort beer! I forgot it! I read through the recipe to check, and to my surprise, no wort beer in the wort bread recipe… That is strange. Well, at least I didn’t do nothing wrong. So I guess I’ll have to use it next Christmas. Or sooner. Or else: One more year in the fridge. (yes, I had some left from last year.)

Vørterbrød
250 g raisins
5 dl water
600 g wheat
400 g rhye
10 g (2 ts) sea salt
100 sugar
50 g yeast
100 g syrup
0.5 ts ground pepper
0.5 ts cinnamon
0.5 ts ginger
0.5 ts ground cloves
0.5 ts ground anise
50 g butter

(You’re supposed to soak the raisins for one day, but I didn’t and it tasted fine, so you can leave that part. I also left out ginger and pepper. Didn’t have any and it was too snowy outside…)

Directions

Add sugar, egg, butter, salt, cardamom and 2 cups flour; mix well. Stir in raisins and enough remaining flour to form a soft dough.

Turn onto a floured surface and knead until smooth and elastic, about 6-8 minutes. Use as little flour as you can, the dough should be a little sticky. Place in a big bowl covered with clingfilm. Let rise in a warm place until doubled, about 1 hour.

Punch dough down and divide in half. Shape each portion into breads. (I made one bread and the rest buns. Of course you can make only buns too, if you prefer) Cover and let rise in a warm place until doubled, about 1 hour. Brush the breads with one whisked egg.

Bake at 200 degrees C or 395 degrees F for 40-50 minutes or until dark golden brown. Cool on wire racks. Serve while still warm with butter, cheese or jam. Have yourself a merry little Christmas moment.

Chocolate pistachio fudge

Christmas is here and I’m all wrapped up in gingerbread, presents and ornaments. To me, as to so many others, Christmas and advent is so much about the food. Gingerbread, cookies, breads, sweets and other things that will fill the house with that lovely Christmas smell. Somethings are already baked: The gingerbread house me and my boyfriend constructed, still stands (hurray!), looks good, but smells even better. That’s my number one reason to make gingerbread – instant Christmas smell! I also like to give away edible presents, so I preserved some plums when they were in season and some pears as well. And last week, I had my girlfriends over for a little workshop, and we made different kinds of sweets. Homemade sweets for Christmas is both fun to give and receive. I had seen this recipe on Nigella Express, and it looked so good, I had to try it. And quite easy to, which we all like in this busy time of the year.

Chocolate Pistachio Fudge
350g chocolate, at least 70 per cent cocoa solids, chopped
1 can condensed milk (397 g)
30g butter
pinch salt
150g unsalted pistachios, shells removed

Place everything apart from the nuts in a heavy-based pan over a low heat and stir until melted and well combined. Place the nuts into a freezer bag and bash them with a rolling pin, until broken up into some large and some small pieces. Add the nuts to the melted chocolate mixture and stir well.

Pour the mixture into a 23cm square tray, smoothing the top with a wet palette knife.
Let the fudge cool, then refrigerate until set. Cut into small pieces.
Once cut, the fudge can be kept in the freezer – there’s no need to thaw, just eat straight away. Or give some away!