Crispy chicken burger

Burger with friends

I’ve never really been mad about burgers. Not earlier anyway. Mostly because my burger experiences has been limited to those sold at certain fast food chains. And of course, it is what it is. You get what you pay for. And that’s ok, nothing wrong with that, but we can all agree that it’s not a culinary gourmet-experience. I worked at Burger King for two years. I had a whopper once. But to credit Burger king, I did discover a quite tasty burger. The crispy chicken burger. Crispy, deep fried and spicy. Actually really good! That was my lunch for two years… (Good thing I quit before I started expanding to the point of no return…)

So when my boyfriend for the first time suggested to make burgers for dinner a couple of years ago, I agreed, because it’s always fun to try new things, but I didn’t really think he would win me over. But he did. Indeed. I can easily say that I’ve made up for all the burgers I haven’t eaten in the past. He makes the best burgers I’ve ever tasted. So that’s become a regular saturday-dish in our house. Actually so much, that we’re starting to get tired of it. So when we decided to make burgers for dinner again, it was time for something new. To spice it up. Turn things around. Small changes with great outcomes! And that’s when it hit me: Chicken burgers!

We had to make chicken-burgers. I seriously don’t know why I haven’t thought of that sooner. And with the Burger King-chicken-burger in mind, we came up with a way to do it. I wanted a crunchy and crispy surface, preferably deep fried, but my boyfriend convinced me to just fry it. And the rest is pretty much as any burger – a tasty white bread with lots of nice topping. Above all, enough mayo.

Ingredients for 2 hungry people:
Hamburger-bread (Ciabatta is great for this shape)
2 chicken filets
flour
about 100 g of breadcrumbs or crushed biscuits
Paprika, chili, salt and pepper – or spices of your own taste
1 egg

Topping:
Lettuce
Mayo
Tomato
Onion
Barbeque-sauce (Bull’s Eye is perfect)

Directions:
Cut the chicken filets in halves, lengthwise. Or in thin slices.
Crush the crumbs, and add the spices.
Whisk the egg together. Roll the chicken pieces in flour, dip them in the egg and cover in crumbs. And do the same to all the chicken pieces.

Heat a good amount of oil in a frying-pan, and fry the chicken pieces – two at a time. Don’t turn on full heat, cause it burns easily. When they’re golden brown, turn over and fry on the other side. You might want to check the first one to see that it’s properly cooked through, but as long as you make them quite thin, it shouldn’t be a problem. Put them on a paper-towel to drain, while you finish the rest.
And when that’s done, all is pretty much done. (Assuming the potatoes/fries are ready. If not, they need about 45 minutes in the oven, so start with them.) Heat the bread in the oven for a few minutes, just enough to make it warm and a little crunchy. I bought ciabatta, which turned out to be perfect for the chicken-filet-shaped burgers.

If you need instructions to put together a burger, you’ve come to the right place. This I know. I didn’t spend two years at Burger King for nothing. I made the chicken-burger my niche, and developed it to make it just the way I like it. The only thing I was missing was bacon. So if you have some, bring it on, my friend!
But, first things first. The bread. I recommend ciabatta, or something like that. I don’t care for those sweet hamburger-breads.

Divide the warm bread in two, and spread on a lot of mayo. And then some. Both top and bottom. And of course, no need to say it is Hellmanns we’re talking about.
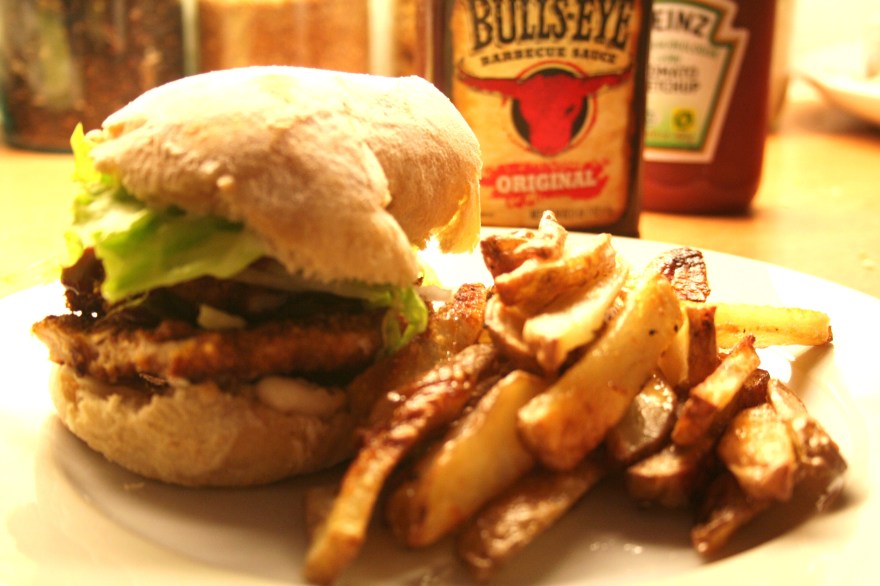
Put on a few big leaves of lettuce on the upper bread. Add a slice or two of tomatoes, depending on the size. Then place the newly fried chicken on the lower bread. Spread over some raw onion rings (not the fried ones, although that’s good as well! Tried it out during my Burger King-career) And to finish it off, a dash of barbeque sauce. Bull’s Eye was great with it. And then, smack it together, and you’ve got yourself a chicken-burger!

And as with any burger, serve with a solid portion of fries and a coke! You don’t need a burger-background to figure that one out!

Tea time

scones and a nice cup of tea

Ah, the serenity and pleasure of studying at home. Peace and quiet, but also many distractions. But I guess that’s exactly what I like about it. The breakes I allow myself. Highlight of the day! I love to see that I’ve spent a few hours, and that I freely can take a nice little time-out with a glossy magazine and something good to munch on. And it’s always something good. This is not the time nor place for salad or such a thing. Nothing wrong with a salad, only at this time, studying at home around noon, I want sweetness, a reward for my patient studying. This calls for sugar and caffeine! Coffee or tea and whatever I can find of interest in the kitchen, without actually making anything… I always have my freezer packed with some of those sweet treats, so it’s always fun to see what I have to offer myself. But one thing is for sure. I always have some backup-scones, for occasions like this. And today, I wanted scones. You see, I work at a bakery, (Lie Nielsen) and they make the best scones ever. I need a couple of those throughout the week. My favourite is with raisins and walnuts. I really don’t know how they get them to be so firm and non-crumbly. Ideas? Mine crumbles up by the slightest touch, so I depend on these. I live on these. I love these.
The look.
Of love.
Is in.
These scones… and a cup of tea!

Spring rolls (for the lazy and clumsy)

easy spring rolls

I live by one rule: Anything that is deep fried, is good. Whatever it starts out to be, when you deep fry it, it turns out better. Or at least just really really good. Yesterday I made some deep fried bananas with syrup and ice cream (oh so good) and now I’m on a deep frying-roll! So natually, spring rolls was up next.
Well, that’s not really true. Or, I made spring rolls, that much is true, but I didn’t really deep fry them. I’ve experienced that when I deep fry spring rolls, they tend to fall apart once they enter the oil, or at least when I’m trying to flip them over or get them out of the pan. Then the filling falls out, and it turns out like bad and unwanted tempura. Then you burn yourself, and you realize the effort is way bigger than the result. And, you need a lot of oil if you’re making a nice portion – I know I always do! And however good it is with spring rolls drenched in oil, it’s not too good for either you or your wallet. So in these health-aware and hard financial times, I make them amateur-style. In the oven. (I’m lying again! I always make them like this…sorry) Save yourself from the annoyment of broken spring rolls and wasting the entire bottle of oil. Much easier and a little less oily. I’m not sure that is a good thing, but it’s definitely easier.

So this is how I make spring rolls:

Ingredients:
Spring roll wrappers
Carrots
Mushroom
Cabbage
Bean sprouts
Spring onion
Garlic
Chicken filet or beef

Well these are really just examples. You can use whatever you like or have, but those I mentioned are nice basics. I didn’t have bean sprouts, and I replaced the spring onion with leek. Doesn’t matter. It’s Sunday, I’m lazy and most of the shops are closed, so I took what I could find. The main thing after all, is that you have oil. I made mine vegetarian and the rest with chicken, for my boyfriend. I’ve come to the fact that I simply think they’re better without meat. But suit yourself.

Directions:
Chop all the vegetables quite finely.
Cut the meat in small bite size pieces.
Fry the chicken in a medium size pan until it’s evenly golden. Remove from pan.
Stir-fry the vegetables on high heat a couple of minutes. Don’t overcook them. They’re just going to turn slightly softer, but still crunchy. When they reach that point, add the chicken, a splash of soy sauce and sesame oil. Stir for about a minute and remove from heat.
And now it’s wrapping time. (This is where I exit the kitchen and leave it to my boyfriend. I’m not a good roller/wrapper. Too impatient and greedy. Which also may be why my spring rolls fall apart when I try to deep fry them – they are just too stuffed…) And 30 minutes later it’s magically spring roll time!

But if you don’t have a someone else to do the wrapping, don’t panic, it’s not hard really.
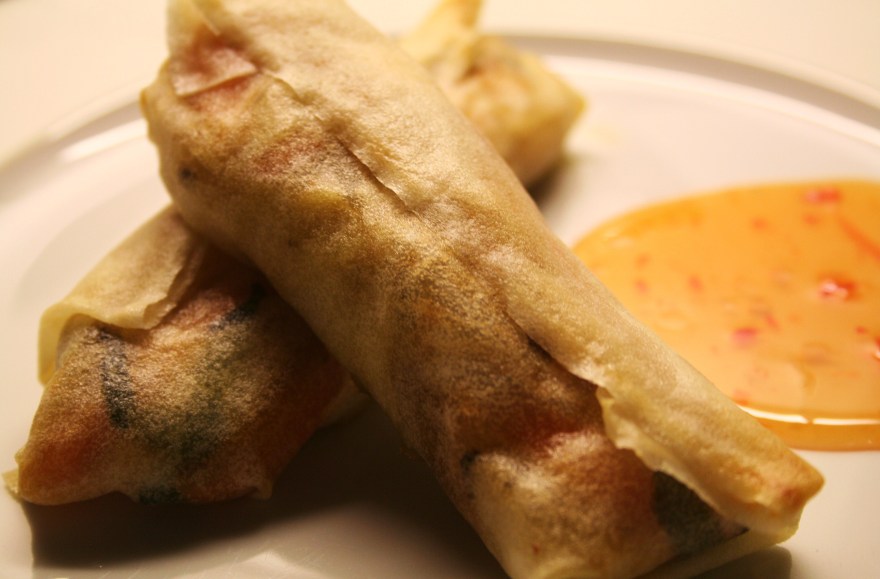
Remember to take the wrappers out of the freezer about 10 minutes before you start. And turn on the oven at 200 degrees celsius while you’re at it. Place approximately 1 tablespoon (or 2 or more if you can, after all, these wrappers come in different sizes) of the vegetable-mixture in the center of spring roll wrappers. Roll wrappers around the mixture, folding the edges inward to close.
Moisten your or someoneelse’s fingers in water, and brush wrapper seams to seal. And repeat!

Brush a baking sheet with oil, and arrange the spring rolls. Brush them generously with vegetable oil. And remember, the more, the crispier and better it will be. You’re still saving a lot of oil. Bake in preheated oven for about 25 minutes or until they turn golden and crispy. Serve with rice and sweet spring roll sauce. Sit down and eat.
Now, wasn’t that easy?

Best brownies ever?

bad picture of a good brownie
I’ve never been the biggest brownie fan around. I’ll definitely eat them, it’s not that, but I see myself more as a cake person. Maybe because I haven’t succeeded in making the perfect batch of brownies, yet. My brownie-making experience limits to only a couple of tries. Quite embarresing actually. I’m a quitter!
But the last couple of days I’ve had a desperate craving for brownies. Maybe it was a sign from above, that I should leave my previous brownie-experiences behind, and start over. And so I did. The thing is, brownies are actually always good, – after all, it’s chocolate we’re talking about – but only a few times exeptionally good. But those are the ones I’m looking for.The chewy, fudgy and dense type that literally melts in your mouth. Unfortunately they don’t come around too often. So my high brownie-standards ususally results in disappointment. But tonight it was time for another try. After some searching on the internet, I found Julia Child’s so called “Best brownies ever”, and decided to give it a go.

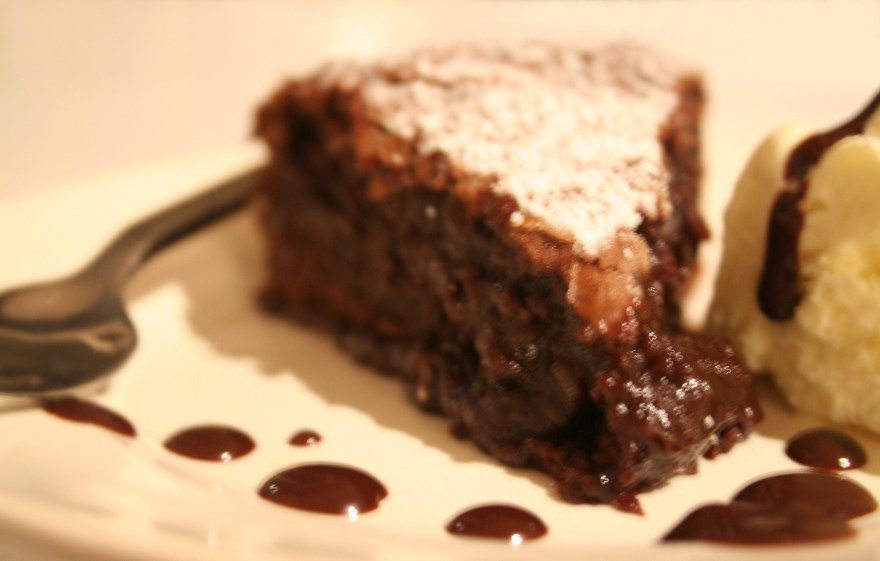
The brownies turned out chewy but with a gooey, almost liquid center. Underbaked, some might say. I’m not one of them. Best brownies ever? Very possible! I’m too inexperienced in the brownie-liga to say. All I can say is they were de-li-cious. Very moist. Very dense. Very chocolate. Maybe more cake than brownie, well, honestly, on the border of chocolate fondant, but what’s in a name, right? I’ll definitely make them again. I thought they were a little too sweet, but I didn’t use bitter chocolate. I will next time. And I imagine a coffee-chocolate sauce will bring out the best in these babies. Really soak them up. And play down the sweetness a little. But first there’s some baking involved.

Ingredients (serves 15)

250 ml sifted all-purpose flour
4.5 ml salt
200 g unsalted butter
100g unsweetened chocolate, coarsely chopped
50 g bittersweet chocolate, coarsely chopped
400 ml sugar
4.5 ml pure vanilla extract
3 large eggs

First of all, I had to make this recipe slightly smaller. After all, there were only two of us, and even me and my boyfriend have limits. Or I have to set some limits…
The mixing method is a little unorthodox for a brownie, but who cares as long as it tastes good in the end! Maybe that’s what separates these from the regular brownie. The batter is also quite thick, almost frosting-like.

Directions:

Preheat the oven to 175 degrees celsius.
Melt the butter and chocolate over medium heat, stirring frequently. When it’s all melted, add half of the sugar and keep stirring for about a minute, or until the sugar starts to dissolve. Remove from pan and add the vanilla. The recipe says at this point: Pour into a big bowl. But I’m lazy and always want to minimize the dirty dishes, so I didn’t. (Though, I probably should have. It became pretty messy with such a small pan after all. Naughty me.)

Whisk the remaining sugar and eggs until just combined. Slowly, pour half of this mixture into the chocolate mixture stirring gently. Then whip the rest of the egg-sugar mixture until it thickens and turns pale.
Using a spatula, delicately fold the eggs into the chocolate mixture, and then fold in the sifted dry ingredients. Pour and scrape the batter into a suited pan. (9-inch according to the recipe) In my case, a small round form, 20 cm in diameter. It turned out quite tall, so the pan could easily have been bigger.

Bake in center of the oven for 25-30 minutes. Check with a fork after 25 minutes to se how they’re progressing. Bake them until barely set, if you like them gooy like I do. Mine took 30 minutes.
Cool on a rack.
Or don’t!
They taste really good warm, as long as you manage to cut them. (And I can imagine they taste equally yummy the next day, when it sets and gets relly firm and fudgy. I see a proper women’s day breakfast coming up tomorrow…)

Sprinkle with sifted icing sugar, and they’re ready to serve!
But to make good even better, if you want brownie-extravaganza, and who wouldn’t want that
– serve with ice cream and hot chocolate sauce. And then…….ahh, brownie-heaven!

Leftover-pie

010

I happen to actually like leftovers. Or not so so much the leftovers as the rewarding feeling of using leftovers to make something good instead of throwing it away. It’s the housewife in me. Makes me feel good. I decided today was definitely a leftover-day. A) I had various leftovers from the past dinners in the fridge, b) not too much money to spend, and c) no real interest in going out in the cold to get ingredients. So, after a peek in the fridge to see what really was there, and a quick look in some cookbooks, I decided to make a potato-pie. Never done that before! I had some boiled potatoes and bacon as my key ingredients. So here’s what I did:

I made the pie crust of fine rhye flour, (because I didn’t have wheat) butter, salt and a splash of water. I didn’t really measure anything up, so you just have to trust your inner pie-instincts on this one. I worked it together with my fingers and pressed it into the pie form. This was going to be a quick no-fuss leftover-dinner, so it was going straight into the oven. No time for letting the dough cool in the fridge, or frying the crust before the filling. Oh no.

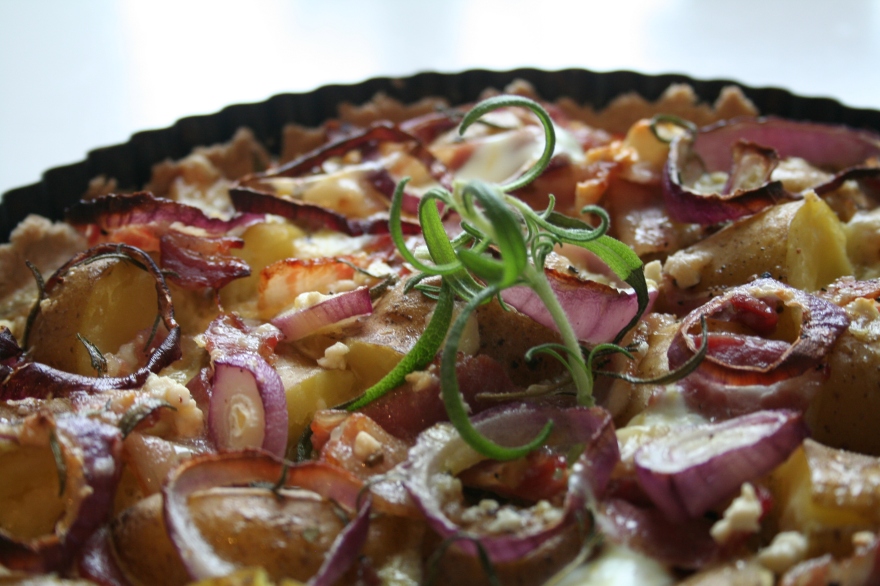
I cut the potatoes in medium-size pieces and put in the pie. I sliced the bacon thinly, and distributed it over and in between the potatoes.Then I sliced 1/2 red onion and spread it over the potatoes. I had a little Jarslberg and some fetacheese too, and that’s always good in a pie. Or wherever, actually… So I tore it up in small pieces and spread it evenly over the pie. I whisked together an egg, full cream and some of the oil from the glass of fetacheese. Sprinkled with salt and pepper, and poured it over the pie. Since my rosemary is still with us, I cut of some leaves to garnish the pie. And into the oven it went! 200 degrees celsius for about 30 minutes.

After 35 minutes, my pie was done. I made it real simple and ate it with just some plain rocket on the side. But it was quite good, and that’s good enough for me. A nice reward for keeping the leftovers, I’d say. So if you have some potatoes lying around, you know what to do. If you don’t, just be creative! If it’s good for me, it’s probably good for you. And besides, no one needs to know. Leftovers are usually beyond recognition when you’re done with them! Have fun!