Rhubarb muffins

IMG_9513

Rhubarb season is finally upon us! My favorite season? At least one of my favorite vegetables! Yes – it´s a vegetable!!!

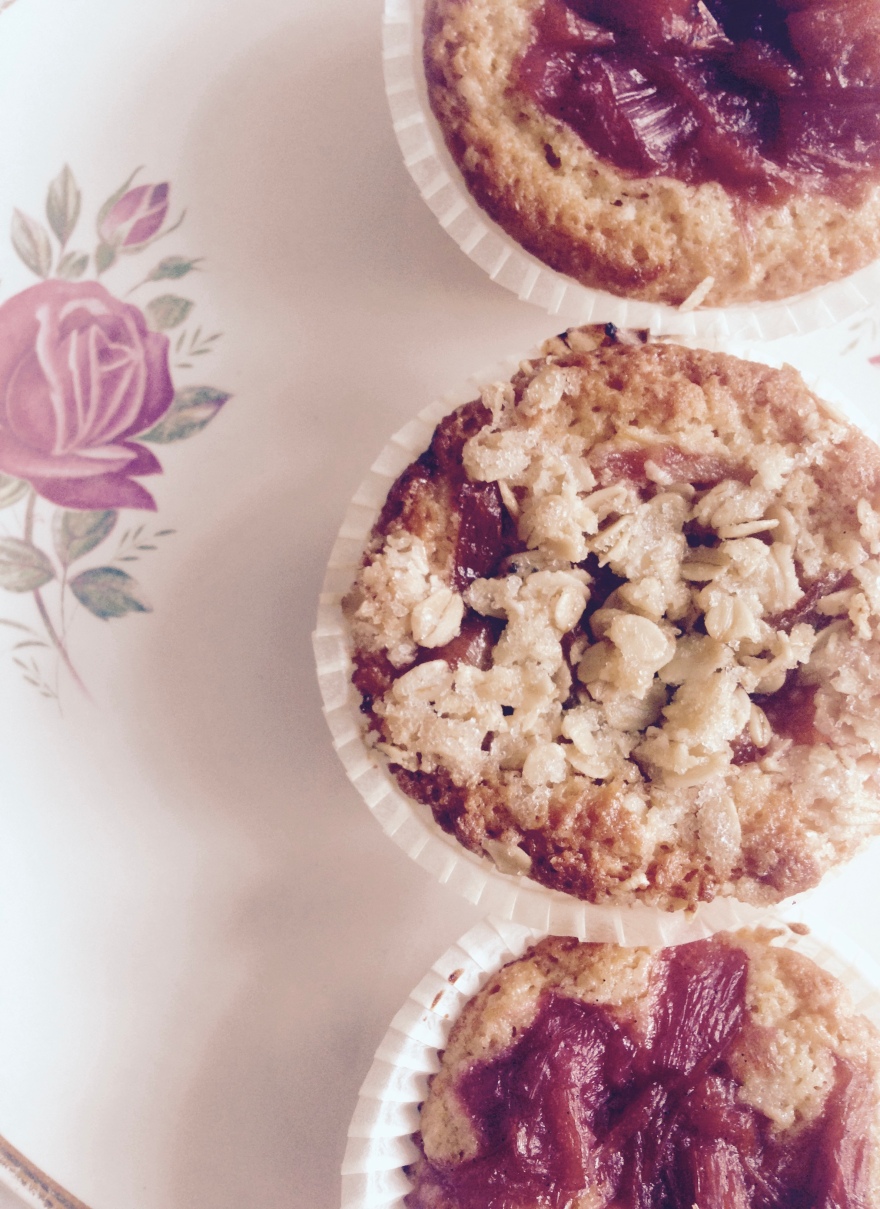
When rhubarb arrives and you see various recipes for rhubarb crumble, lemonade and muffins – it´s a sure sign of spring and a promise of summer. I might try out a new recipe each year, but I usually fall back to crumbles and this old classic: My mother´s rhubarb muffin. Mum knows what she´s doing already, so no need to change or tweak this. It´s simply perfect.

So when I visited my parents yesterday, I made a request for some rhubarb, and in my defense the saying says to pick it within midsummer which is only a few days away….So I took home a large bunch to do some baking. When my father saw me and the rhubarb he suggested the muffins. He loooves them. So do I. Actually, everyone does. So the idea was planted in my head: What better way to start rhubarb-baking-season than with a real family classic!

So, today, equitted with rhubarb, eggs, butter and apron I realized: The recipe is in my recipe book which currently is located in copenhagen! And my mother is out of town!!! What to do? Well, luckily, it´s not the only rhubarb-muffins-recipe on the planet (one of the best, perhaps) so I turned to google as I often do and found what seemed like a good replacement!

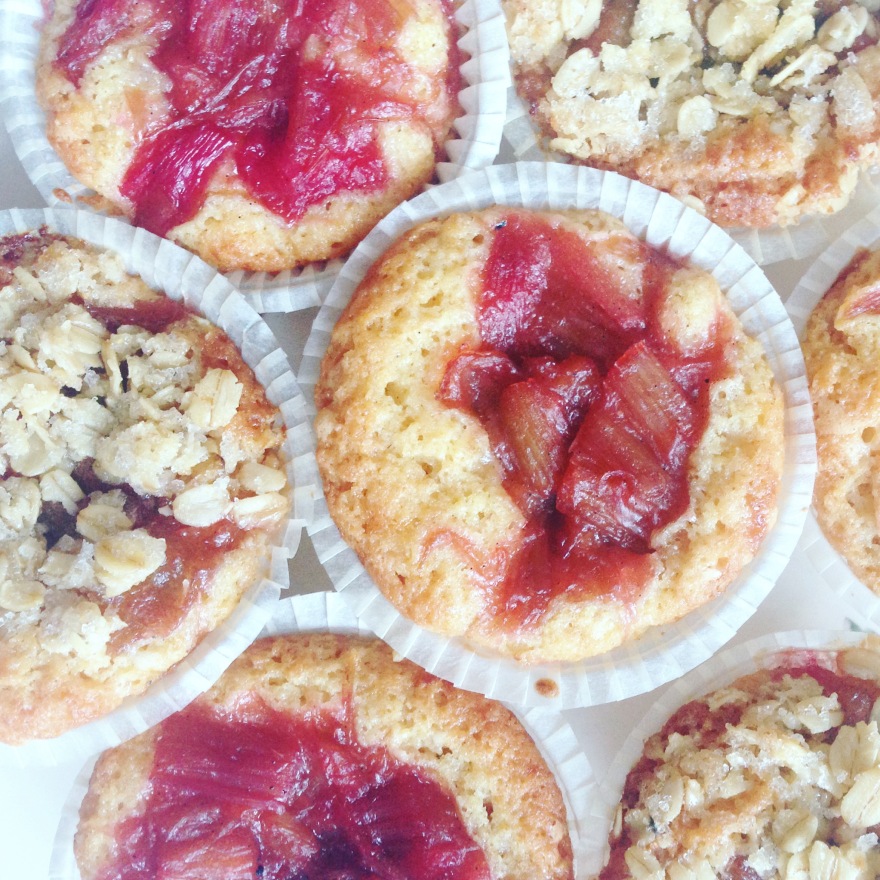
And indeed it was! Actually, in a way this is a more extravagant version of the usual…

Maybe a little less gooey, but my go-to-recipe is so gooey you need a spoon, so that´s maybe a little overexaggerated for some! 😉 Anyway – both equally delicious!

I hereby declare rhubarb-season for opened!

IMG_9534

Rhubarb muffins

Rhubarb compote/ Rabarberkompot
10 oz rhubarb / 300 g rabarbra
1/2 vanillabean/ ½ vaniljestang
2.5 oz sugar / 70 g sukker

Clean and cut the rhubarb in inch-sized chunks. Pour rhubarb, sugar and vanillaseads and bean in a pan and stir. Cook on medium heat until everything is soft and compote-looking.

Rens rabarbraen og skjær dem i skiver på 2-3 cm
Ha rabarbra, sukker, vaniljekorn og den halve tomme vaniljestang i en gryte – og rør det sammen. La rabarbraen simre ved middelvarme til de er møre og minner om en grov pure.

Muffins

3 eggs / 3 egg
6.5 oz sugar / 180 g sukker
8 oz flour / 220 g mel
2 tsp vanilla sugar / 2 tsk. vaniljesukker
1.5 tsp baking powder / 1,5 tsk. bakepulver
5 oz butter (melted) 150 g smør (smeltet)
4.5 oz marcipan finally chopped / 120 g revet marsipan

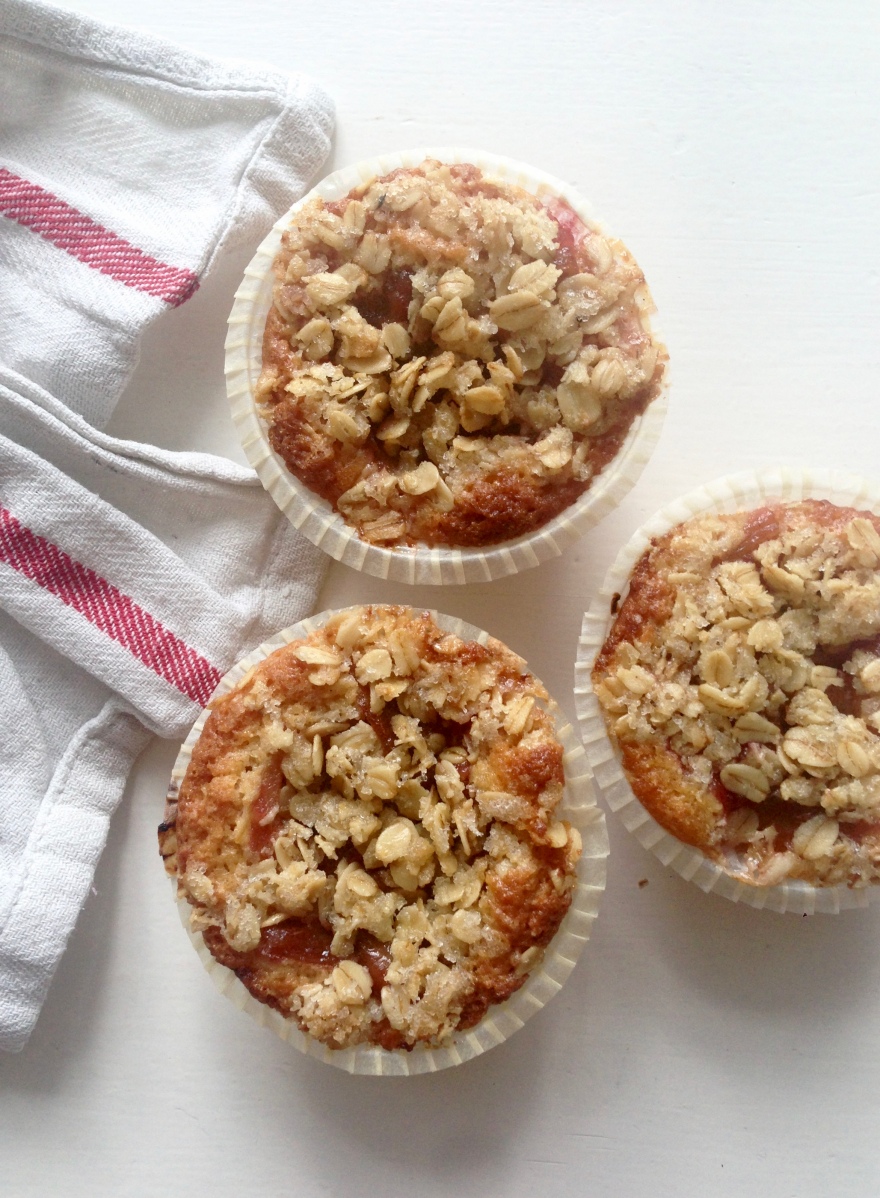
Whisk egg and sugar until creamy. Stir in the dry ingredients and the melted and cooled butter. Finally fold in the chopped marzipan. Divide the batter in muffin cups, and top with a spoonful of the rhubarb compote. If desired, sprinkle with crumble!  Bake for 20-25 minutes at 350 F.

Pisk egg og sukker til en luftig masse.
Rør alle de tørre ingredienser i og det afkjølede smør.
Vend til sist revet marsipan i muffindejen.
Fordel deigen i muffinsformer. Top med rabarbrakompott og drys en teskje crumble over.
Bag ved 180 grader i 20-25 min.

IMG_9520


Brownies with walnuts and browned butter

_MG_0427

I´m home on holiday – again! I know!!! That´s the advantage of having my exam after Christmas – getting an extra vacation! So, that´s pretty nice… I came home last weekend to Celebrate my boyfriend´s mother´s birthday, cause she was turning 60, and having a big celebration. And the plan was to fly back on Sunday for my exam the following monday. But, it turned out, that after my exam there weren´t any lectures until February! And as the exam was a home-exam, well, why not stay at home in Norway writing it? After all, that is my primary home! So I did! And now I have a good week at home to do – well – bake? It´s not like I have anything else scheduled! Well, other than seeing family and friends, of course. But those things are very well combined. Last night, I had a friend over while my boyfriend was at football practice. Our initial plan was meeting at a café and then going to the cinema, but poor as we are, we decided on a night at home instead.

I promised her some baked goods, and had my mind on brownies. She´s pretty much a chocoholic (yeah – blame her…) and, well, ok, I was having massive chocolate cravings, so brownies seemed just right. And easy enough to gobble on when you´re deep down in the sofa, under the blanket, watching tv. Important. So, the one thing I was going to do that day, was baking a batch of brownies before her arrival. But did I manage? Nooo. I spent too much time gazing out the window. Facebooking. Warming my hands above the oven. Staring out the window again. And searching for recipes – brownie recipes. I had borrowed the Hummingbird bakery cookbook from my mother, and was planning to make the basic brownie recipe from that book. But then I had some extra time on my hands, and starting searching online for recipes…

_MG_0423

_MG_0420

And then I found these. They looked insanenly good. I was a little surprised to see that the brownies were made of cocoa, not chocolate, I mean, being a brownie, and all! And still – they looked so chocolatey! But, than again, I do recall a super-moist chocolate cake made from cocoa, so that didn´t put me off! I was a little afraid that the basic Hummingbird brownies weren´t gooey enough, or fudgy enough to my like, cause I couldn´t really judge by the photos. And to me, that´s what brownies are all about. Fudge and goo – yes please! I realized that the ingredients and measures in the cocoa brownies were the same as another Hummingbird-recipe, the frosted one, though without the frosting… So, I decided on that one, and got to use the book after all! I just tweaked the methods, to go with Alice Medrich´s approach. And also with her addition of browned butter…..mmm.

So, I never managed to bake the brownies before my friend arrived. But what´s good, is that these brownies come together in no time! Cause we were gonna have brownies, that was for sure! I just whipped them together in a hurry after dinner, and within an hour, they were served! And maybe it was just as good I didn´t bake them in advance, because what´s better than warm, fudgy brownies, straight from the oven?It was the perfect accompaniement to Bridesmades, a glass of milk and good company!

Verdict: Fudgy? Check! Chocolatey enough? Check! Good? Hell yeah!
So yes, the brownies lived up to their expectation, and to the photos – Luckily!

Bake away!

brownie

Cocoa Brownies
(Adapted from Alice Medrich)

Makes 16 larger or 25 smaller brownies

10 tablespoons (140 grams) unsalted butter
1 1/4 cups (250 grams) sugar
3/4 cup plus 2 tablespoons (65 grams, though some brands may weigh more) unsweetened cocoa powder
1/4 teaspoon salt (or a heaping 1/4 teaspoon flaky salt, as I used)
2 large eggs, cold
1/2 cup (65 grams) all-purpose flour
2/3 cup (75 grams) walnut or pecan pieces (optional)

Position a rack in the lower third of the oven and preheat the oven to 170°/ 325°F. Line the bottom and all 4 sides of an 8-inch square baking pan with foil and coat with nonstick vegetable spray

Melt the butter in a medium saucepan and continue to cook, whisking gently, until it is golden brown and the milk particles suspended in it are reddish brown. Remove the pan from the heat and stop the cooking by immediately adding the sugar, cocoa powder and salt. Stir to blend. Let cool for 5 minutes; the mixture will still be fairly hot. (Well, I didn´t have time for that – instant chocolate cravings! And they still turned out beautifully!)

Add the eggs one at a time, beating vigorously with a wooden spoon or a silicone spatula after adding each one. When the mixture looks thick, shiny, and well blended, add all of the flour and stir until you no longer see streaks of flour, then beat vigorously for 50 to 60 strokes with the wooden spoon or the spatula. Stir in the nuts.

Spread the batter in the lined pan, swirling the surface if you like. Bake for 20 to 25 minutes, until a toothpick inserted into the center emerges almost clean (the brownies will still be soft and gooey even if the toothpick looks clean). Cool in the pan on a rack.

Lift the edges of the foil liner and transfer the brownies to a cutting board. Slide a metal spatula under the brownies to detach them from the foil (or invert the brownies and peel off the foil, then turn the brownies right side up again). Cut into 16 or 25 squares. The brownies keep stored airtight, for 2 to 3 days.

_MG_0426

Best. Cookie. Ever.

Ok. So this is it. This is IT. THE COOKIE. The one and only. Well maybe not the only, but definetely the one. The one I´ve wanted to be able to create in my own kitchen, meeting all my criterias for a perfect cookie: Crunchy edges, a chewy interiour, a deep flavour, a buttery texture and of course loaded with decent sized chunks of chocolate and hazelnuts. Ahhhh, what can I say – I`m in Heaven!!!

I´ve been meaning to make this for quite some time, but being the impatient baker I am, I´ve never got around to it until now. Cause this cookie needs some time and patience, my friend, but it´ll be worth it! So worth it… I promise! The reason why I baked them now, was simply to satisfy my chocolate chip cookie-cravings that appeard a few weeks back. But, I was able to resist the instant cravings, so that I wouldn´t give in for just any mediocre cookie. I wanted something more. Since I haven´t had a cookie in God-knows-how-long, this cookie had to be good, or actually better than good. So I searched for the recipe that would give maximum cookie-pleasure!

If I had the time, or the people to feed, I would easily bake cookies every week and try out several different recipes, and it wouldn´t be so bad if some of them turned out just ok. But I don´t get to bake cookies as often as I´d liked to – so when I wanted to bake cookies, I didn´t want to settle for “just a cookie” – I wanted the best chocolate cookie ever. Period. (Don´t we all?) So I put my impatience and cravings aside and got baking. I even followed the recipe precisly, with all the important notes that would influence on the final result. (No, that´s a lie. I didn´t have cake flour…I guess it would be even better with that! Next time! Cause these cookies will be made again, and again…) And boy…..was it all worth it? – Hell yeah!

I mean, with a the title “The Only Chocolate Chip Cookie I Will Ever Need to Know How to Make For The Rest of My Life” – I knew this was a recipe worth trying out. The only thing it requires is a little patience due to the refrigerating, and some planning to get everything at room temperature before you dive in. This is no “I want cookies – NOW” kind of recipe. This is a “I want the best damn chocolate chip cookies that have ever graced this earth and I am willing to practice some patience to get them in my mouth” recipe.
It turned out that this recipe was from Jaques Torres, which I´ve been drooling over, and I´ve heard people raving over claiming it to be the best ccc-recipe, and I´ve been planning to make it forever, but never got around to make due to my impatience. And when this turned out to be that same recipe, just disguised under that promising title, I knew these cookies had to be made…


Chocolate chip cookies (adapted from Jaques Torres)

2 cups minus 2 Tbsp. (8 ½ oz.) cake flour
1 2/3 cups (8 ½ oz.) bread flour
1 ¼ tsp. baking soda
1 ½ tsp. baking powder
1 ½ tsp. coarse salt, such as kosher
2 ½ sticks (1 ¼ cups; 10 oz.) unsalted butter, softened
1 ¼ cups (10 oz.) light brown sugar
1 cup plus 2 Tbsp. (8 oz.) granulated sugar
2 large eggs
2 tsp. vanilla extract
1 ¼ pounds bittersweet chocolate chips or chunks, preferably about 60% cacao content, such as Ghirardelli
Sea salt or kosher salt for garnishing

Combine flours, baking soda, baking powder, and salt in a bowl. Whisk well; then set aside.

Using a mixer fitted with paddle attachment, cream butter and sugars until very light and fluffy, about 3 to 5 minutes. Add the eggs, one at a time, mixing well after each addition. Mix in the vanilla. Scrape down the sides of the bowl with a rubber spatula as needed. Reduce the mixer speed to low; then add dry ingredients, and mix until just combined. (Unless you have a plastic guard that sits around the rim of the bowl, this will make a big mess at first, with flour flying everywhere. I found that carefully holding a dish towel around the top of the bowl helped a lot.) Add the chocolate chips, and mix briefly to incorporate. Press plastic wrap against the dough, and refrigerate for 24 to 36 hours. The dough may be used in batches, and can be refrigerated for up to 72 hours.

When you’re ready to bake, preheat oven to 350°F. Remove the bowl of dough from the refrigerator, and allow it to soften slightly. Line a baking sheet with parchment paper or a nonstick baking mat.

Using a standard-size ice cream scoop – mine holds about 3 fluid ounces, or about 1/3 cup – scoop six mounds of dough onto the baking sheet, making sure to space them evenly. Sprinkle lightly with sea salt, and bake until golden brown but still soft, 15 to 20 minutes. Transfer the baking sheet to a wire rack for 10 minutes, then transfer the cookies onto the rack to cool a bit more.

Yield: About 24 cookies (I made over 30, but I guess I don´t make them US-sized!)

Carrot spice muffins

We´re having a group project at school for the moment. It´s not really hard. There´s really not a lot to do. It´s not very time consuming. We just have to get together, from time to time, to figure out what to do next and to plan and divide the tasks between us. Quite frankly, I feel like I´m having a vacation, because there are so little to do, so few lectures, and the ones we have finish before noon, so there´s a lot of time waiting to be filled! It´s not like I have a job, a specific hobby or workout schedule, so what else to do than bake! Wait, I guess that IS my hobby! 😉

I´ve been trying out a few recipes from my beloved Baking from my home to yours, which I feel obliged to, as it was such a hassle to get it. But within the muffin section I have only tried one recipe – the great grain muffins. On the other hand, I´ve baked them a couple of times, cause they are so tasty! But if the rest of the muffins are as good as them, I think I ought it to myself to bake my way through them! I wanted to bring some muffins to school for my group to enjoy, for a day we planned to stay at school finishing our project. And since I and my fellow students study nutrition, I decided the carrot muffins would be appropriate! Slightly healthier, but still with the sweetness and moistness of a regular carrot cake, but without the frosting. Though frosting probably could work out very well too… (Or maybe omitting the frosting is the the health-alibi. Whatever. When you put vegetables into muffins it equals healthy in my world!)

So, the verdict: They were absolutely lovely! I got praises and requests about the recipe from the group, they were a total hit! I loved their moistness, but without that greasy feeling. And they´re just sweet enough, without leaving you with a feeling of going into a sugar-coma. And – believe it or not – I actually didn´t miss the frosting! I did put some butter on, just to try it out, but I guess that´s just me. I butter everything! But there was really no need to. I did cut back a little on the oil and sugar, which wasn´t a problem, and next time I´ll try to substitute some of the flour with whole wheat too. And, before you dig in, I have to say: let them cool. It´ll be worth it. The flavour intensifies and they become so much better! And I loved the different textures provided by the carrots, raisins and walnuts. I didn´t have coconut, so I left that out, but I guess that would be a nice addition texture- and taste-wise! I´ve actually never tried coconut in carrot cake, so I guess it´s time to face that fear! Next time. Because there will certainly be a next time with these!


Carrot Spice Muffins

from Baking: From My Home to Yours, by Dorie Greenspan
makes 12 muffins

2 cups all-purpose flour
1/2 cup sugar
1 tablespoon baking powder
1 1/2 teaspoon ground cinnamon
1/2 teaspoon ground ginger
1/4 teaspoon salt
1/3 cup (packed) light brown sugar
2/3 cup flavorless oil, such as canola, safflower or corn
2 large eggs
3/4 cup whole milk
1 teaspoon pure vanilla extract
1 cup shredded carrots (about 3, peeled and trimmed)
1/2 cup shredded sweetened coconut
1/3 cup moist, plump currants or raisins
1/3 cup pecans or walnuts, toasted, cooled and chopped

Getting Ready: Center a rack in the oven and preheat the oven to 375 degrees F. Butter or spray the 12 molds in a regular-size muffin pan or fit the molds with paper muffin cups. Alternatively, use a silicone muffin pans, which needs neither greasing nor paper cups. Place the muffin pan on a baking sheet.

In a large bowl, whisk together the flour, sugar, baking powder, cinnamon, ginger, baking soda, and salt. Stir in the brown sugar, making certain there are no lumps. In a large glass measuring cup or another bowl, whisk the oil, eggs, milk, and vanilla extract together until well combined. Pour the liquid ingredients over the dry ingredients and, with the whisk or a rubber spatula, gently but quickly stir to blend. Don’t worry about being thorough – a few lumps are better than over-mixing the batter. Stir in the carrots, coconut, currants, and nuts. Divide the batter evenly among the muffin cups.

Bake for about 20 minutes, or until a thin knife inserted in the center of the muffins comes out clean. Transfer the pan to a rack and cool for 5 minutes before carefully removing each muffin from its mold. Or just leave them the way they are!

Agnes Cupcakes – Sea salt chocolate

FINALLY, the day for collecting our cupcakes arrived yesterday. You see, my friend and I bought these coupons where you got 6 cupcakes for the price of three sometime back in the autumn. We were planning on collecting them when my friend finally settled in her new appartment, but things got complicated, so that was delayed. We then decided to go get them some time before the holidays for a little pre-Christmas celebration. That never happened. So we decided on collecting them when our exams were done in january. That never happened either! But yesterday at school when it started to snow, we figured we definetely needed those cupcakes to survive spending the day at the library. Ohh, and am I glad we did! I bought apple, banana and sea salt chocolate, but I only tasted the last one. It was quite rich, but really, really good. Especially the frosting. So judging by that one flavour, I can higly recommend Agnes Cupcakes. And I’ve only heard other people rave about it. But cupcakes and studies go well together I can tell you! Or, actually not. We didn’t get much done, but we had a lot of fun, though. We had our little oasis in between all the dusty old books with colourful cupcakes and fresh coffee! Lovely! It certainly raised the bar for studying a bit…

Lemon cookies

It’s Christmas. It’s cookie time.
Let’s get down to business.

I’ve already made a batch of gingerbread. They turned out well, but they also turned out to be many. I brought one jar to school, now there’s only two back. And at the time, it’s just me. So I’m munching gingerbread, and I’ll be doing that for some time. But nevertheless, I feel the urge to bake some more cookies. Just something else. Something lighter (if you can say that about any cookie) and maybe a little less Christmasy. I found what I was looking for. Even though I’m very traditional when it comes to Christmas – cookie wise anyway – I know there’ll be plenty of that, so why not try something else? It’s still a cookie. So it has a some Christmas to it.

The cookies are lemon and lime flavoured sugar cookies. I found the recipe at joythebaker, but originally it’s from Baking from my home to yours, (I crave that book! I’ve found so many recipes from that book on various blogs, and they’re all so great. But it’s not available here…) and I knew I had to make them rightaway. And so I did…

I didn’t have any lime, but that didn’t stop me as I had a ton of lemons. I just skipped the lime part and added some more lemon instead. And that worked out fine. But I guess the lime would make that little extra je ne sais quoi… Great cookies anyway! Go bake!

Citrus Sables

2 sticks (8 ounces) unsalted butter (preferably high-fat, like Plugra), softened at room temperature
1/2 cup granulated sugar
1/4 cup confectioners’ sugar, sifted before measuring
1/2 teaspoon salt, preferably sea salt
2 large egg yolks, preferably at room temperature
2 cups all-purpose flour.

zest of 1 lemon and zest of 1 lime

For the decoration (optional):
1 egg yolk
Crystal or dazzle sugar.

1. Beat the butter at medium speed until it is smooth and very creamy. Rub the zest of the lemon and lime into the granulated sugar with your fingertips, creating a fragrant sugar. Add the sugars and salt to the butter and continue to beat until smooth and velvety about 1 minute. Reduce the mixer speed to low and beat in 2 egg yolks, again beating until well blended.

2. Turn off the mixer, pour in the flour, drape a kitchen towel over the mixer and pulse the mixer about 5 times at low speed for 1 or 2 seconds each time. Take a peek; if there is still a lot of flour on the surface of the dough, pulse a couple of more times; if not, remove the towel. Continuing at low speed, stir for about 30 seconds more, just until the flour disappears into the dough and the dough looks uniformly moist. If you still have some flour on the bottom of the bowl, stop mixing and use a rubber spatula to work the rest of it into the dough. You want to work the dough as little as possible. What you’re aiming for is a soft, moist, clumpy dough.

3. Scrape the dough onto a work surface, gather it into a ball and divide it in half. Shape each piece into a smooth log about 9 inches long (it’s easiest to work on a piece of plastic wrap and use the plastic to help form the log). Wrap the logs well and chill them for at least 2 hours. The dough may be kept in the refrigerator for up to 3 days or frozen for up to 2 months.

4. When ready to bake, center a rack in the oven and preheat the oven to 350 degrees. Line a baking sheet with a silicone baking mat or parchment paper and keep it at the ready.

5. To decorate the edges of the sables, whisk the egg yolk until smooth. Place one log of chilled dough on a piece of waxed paper and brush it with yolk (the glue), and then sprinkle the entire surface of the log with sugar. Trim the ends of the roll if they are ragged and slice the log into 1/3-inch-thick cookies.

6. Place the rounds on the baking sheet, leaving an inch of space between each cookie, and bake for 17 to 20 minutes, rotating the baking sheet at the halfway point. When properly baked, the cookies will be light brown on the bottom, lightly golden around the edges and pale on top. Let the cookies rest 1 or 2 minutes before carefully lifting them onto a cooling rack with a wide metal spatula.

I decided to give them a little extra decoration, dress them up to be suitable Christmas presents. A nice frosty look to complement the sweetness. I made an icing from icing sugar, lemon juice and a little water. I love lemon-flavoured icing together with lemon-stuff! It’s so…..lemony! So these were right up my alley. But they’re delicious on their own, so it’s not needed at all. Plain, they would be the perfect accompaniement to a cup of your favourite tea, any day of week. But I made them festive and ready for Christmas. And they turned out quite pretty, I think. Don’t you?

Rhubarb Soup – the perfect summer dessert

My dessert repertoar often evolves around cake, chocolate, apples, ice cream or something like that. Not so often fresh and fruity things. More heavy stuff for this girl. That beeing said, I appreciate any kind of dessert. I just don’t make that much different stuff at home, for myself. But now that me and the boyfriend plus my sister and hers have started our 3-courses dinner parties, it’s for reasons like this. To challenge ourselves, and try out new recipes. To try out things we don’t usually make. I was in charge of the menu for our last dinner, and decided on this soup for dessert. Of course, I decide on dessert first, and then plan the rest of the menu… I had some rhubarb in the fridge, the strawberries were at it’s peak, and it was time to reunite with dessert soup. I remember my grandmother used to make this soup which was basically thickened syrup with raisins. And I loved it! And that’s pretty much my only experience (at least my only memory) of dessert soups. So, this soup really passed my expectations, you can say. This is quite a step up from the syrup-soup. (Sorry grandma!) But in her defense, this is created by one of Norway’s best pastry chefs. This is quality all the way. I never thought any soup could be so good. So if you think dessert soups are for grannys only, think again. Me and soup have reunited, and so can you! Trust me, you will. And please don’t judge it by it’s ugly apperance, it wasn’t really photogenic, but you can hold that against anything so delicious.

I had to make this again, cause I forgot to bring my camera to my sister’s house. Well, that’s not the only reason. I needed another bowl of this stuff. But I didn’t find strawberries at the supermarket, so I replaced them with raspberries. Worked out fine, but I think I prefer strawberries.

Rhubarb Soup
500 g red rhubarb
250 g sugar
7.5 dl water
1 vanilla pod
10 g/1 tablespoon maizena
0.5 dl cold water
500 g strawberries

Wash the rhubarb and cut into 2 cm pieces-
Put sugar, rhubarb and water in a kettle and allow to boil without stirring. Turn down the heat, and let it simmer for 30 minutes.
Drain the rhubarb syrup over another kettle, and throw away the rhubarb. Cut the vanilla pod in half and scrape out the seeds. Put the seeds and the pod into the rhubarb syrup, and let it simmer for a couple of minutes. Stir the maizena into 0.5 dl of cold water, and pour this into the rhubarb soup. This will make the soup thicken. Let it boil for another minute. Turn off the heat, and let the soup cool in the fridge or the freezer. (This can easily be frozen down if you want) Remove the vanillapod before serving. Decorate with fresh strawberries and serve with mascarpone cream.

Mascarpone Cream
Seeds from 1 vanillapod
100 g mascarpone
2 dl heavy cream
50 g sugar
lemon juice

Mix everything but the lemon juice together. Whisk untill stiff, but be careful not to whisk too much, cause it will make the cream crack. Add lemon juice at your taste.

Old fashioned chocolate cake

Another birthday, another cake. Usually I’m thrilled about birthdays solely because of this fact. The fact that there will be cake. To be made and to be eaten. I often volunteer to bake, since it’s a nice opportunity to try out new recipes. And this birthday was no different. My little sister turned 24, and I volunteered to bake, knowing that she’d request a classic simple chocolate cake. Unlike me, she’s not much of a cake person, exept for chocolate cake. I baked, we ate, the cake was tasty. She was happy, I was happy. But now, I quite frankly feel I’ve had my share of cake for a while. Like, a few days. No, seriously. July has been nothing but a baking cake-eating birthday marathon. It started on the very first day of the month, with my birthday. Then my niese, then a collague, then a friend, then my boyfriend’s aunt, my sister, and to top it off, I’m having a late celebration with a friend this weekend too! And that probably doesn’t sound all that bad, but in my family, we don’t like to be short on cake, whichs means there’s always leftovers. Meaning after every birthday there’s been a few days binging on leftovers. So, you’re getting the picture… But I’m guessing after a few days I’m ready for some more. This is probably the “I-shouldn’t-have-eaten-that-last-piece-right-before-bed-just-to-make-room-in-the-fridge” part of me speaking. Cause the cake was good, already!

The cake and the recipe comes from my eternal flame….eh, source of inspiration; Nigella Lawson.
From her book Feast. It has an entire chapter of chocolate cakes, and embarresingly enough, I haven’t made any of them until now. I did try one, but failed. So bad. Soo bad. But it was time to move on!
And as she suggests in her book, I started with this one. (Maybe that’s where it went wrong, I started with another one…) I was very in doubt whether to make this or not, cause I’ve heard so many different opinions. And most of them were either loving it or hating it. I decided to make it after reading a review from someone loving it, saying that some people just can’t bake. And I think I can bake. So I challenged myself. The ultimate proof. Luckily it came out well. Phew! That beeing said, I have the best choclate sheet cake recipe, and ever since that came into my life, everything is compared to that. And nothing beats it. It’s so unbelievable moist. I have to get back to that in another post. So this was one of the first times I baked another chocolate cake than that for a very long time, and I feared dryness. But it wasn’t dry. It was quite tall (maybe not after US standards) so if it wasn’t for the icing in the middle it could have been. So don’t skip that part folks! The extra icing is essential.


Old fashioned chocolate cake
(recipe from Nigella Lawson’s Feast)

FOR THE CAKE:
200g plain flour
200g caster sugar
1 teaspoon baking powder
1/2 teaspoon bicarbonate of soda
40g best-quality cocoa
175g soft unsalted butter
2 large eggs
2 teaspoons real vanilla extract
150ml sour cream

FOR THE ICING:
75g unsalted butter
175g best quality dark chocolate, broken into small pieces
300g icing sugar
1 tablespoon golden syrup
125ml sour cream
1 teaspoon real vanilla extract
sugar flowers, optional
Serving Size : Makes about 8 slices

1. Take everything out of the fridge so that all the ingredients can come to room temperature.
2. Preheat the oven to gas mark 4/180°C and line and butter two 20cm sandwich tins with removable bases.
3. Now all you have to do is put all the cake ingredients – flour, sugar, baking powder and bicarb, cocoa, butter, eggs, vanilla and sour cream – into a food processor
4. and process until you have a smooth, thick batter. If you want to go the long way around, just mix the flour, sugar and leavening agents in a large bowl and beat in the soft butter until you have a combined and creamy mixture. Now whisk together the cocoa, sour cream, vanilla and eggs and beat this into your bowl of mixture.
5. Divide this batter, using a rubber spatula to help you scrape and spread, into the prepared tins and bake until a cake tester, or a thin skewer, comes out clean, which should be about 35 minutes, but it is wise to start checking at 25. Also, it might make sense to switch the two cakes around in the oven halfway through cooking time.
6. Remove the cakes, in their tins, to a wire rack and let cool for 10 minutes before turning out of their tins. Don’t worry about any cracks as they will easily be covered by the icing later.
7. To make this icing, melt the butter and chocolate in a good-sized bowl either in the microwave or suspended over a pan of simmering water. Go slowly either way: you don’t want any burning or seizing.
8. While the chocolate and butter are cooling a little, sieve the icing sugar into another bowl. Or, easier still, put the icing sugar into the food processor and blitz. This is by far and away the least tedious way of removing lumps.
9. Add the golden syrup to the cooled chocolate mixture, followed by the sour cream and vanilla and then when all this is combined whisk in the sieved icing sugar. Or just pour this mixture down the funnel of the food processor on to the icing sugar, with the motor running.
10. When you’ve done, you may need to add a little boiling water – say a teaspoon or so – or indeed some more icing sugar: it depends on whether you need the icing to be runnier or thicker; or indeed it may be right as it is. It should be liquid enough to coat easily, but thick enough not to drip off.
11. Choose your cake stand or plate and cut out four strips of baking parchment to form a square outline on it (this stops the icing running on to the plate). Then sit one of the cakes, uppermost (ie slightly domed) side down.
12. Spoon about a third of the icing on to the centre of the cake half and spread with a knife or spatula until you cover the top of it evenly. Sit the other cake on top, normal way up, pressing gently to sandwich the two together.
13. Spoon another third of the icing on to the top of the cake and spread it in a swirly, textured way (though you can go for a smooth finish if you prefer, and have the patience). Spread the sides of the cake with the remaining icing and leave a few minutes till set, then carefully pull away the paper strips.

Cheesecake ice cream

What a glorious idea, incorporating two of the best flavours in the world, into one fantastic dessert. Cheesecake Ice Cream.

I love cheesecake. I certainly love ice cream. And I can most definitely add cheesecake ice cream to that list.

Not surprisingly, I mean how could that ever fail? And why didn’t I try this sooner? It was so delicious, I’m already making a second batch! This is going to be a summer 2010 favourite. I can feel it.

Like the big Nigella Lawson fan that I am (and summer lover), her book Forever Summer is among my favourite cookbooks. Because of the recipes, naturally, Nigellas lovely descriptions, the photos and that it captures a feeling of summer. Whatever season it is outside. But now it is summer, and it’s time to make use of my favourite kitchen tool: My beloved ice cream maker.
In forever summer there are a number of ice cream recipes. I’ve tried several of them (Baci is higly recommended), but somehow I’ve missed out on this one until now. I’ve been thinking of making it ever since I got the book. It was one of the recipes that really stood out. You know, the ones you note to yourself. Well, so much for that note! Years have passed and no cheesecake ice cream was made. I blame myself. But all good things come to those who wait! And it was worth the wait. Luscious satiny smooth ice cream. The feel of an ice cream, but the flavour of a cheesecake. Velvety and sligthly lemony. Topped with crumbled digestive cookies. So good. Soooo goooood. If’re you’re like me – and like your cheesecake and ice cream – make this. Make it now.

INGREDIENTS

175ml full-fat milk
200g caster sugar
125g Philadelphia cream cheese
half teaspoon pure vanilla extract
1 egg
juice of half a lemon
350ml double cream
50g digestive biscuits, crumbled (optional)

DIRECTIONS
Heat the milk in a pan, and while it’s getting warm, beat together the sugar, Philadelphia, vanilla and egg in a bowl. Still whisking, pour the hot milk into the cream cheese mixture and pour this back into the cleaned-out pan and cook till a velvety custard. Stir constantly, and if you think there’s any trouble ahead, plunge the pan into a sink half filled with cold water and whisk like mad. It shouldn’t take more than 10 minutes, this way, for the custard to cook. And when it has thickened, take it off the heat, pour into a bowl and let it cool, at which time add the lemon juice and then the double cream, lightly whipped.

Freeze in an ice cream maker or place into a covered container, stick it in the freezer and whip it out every hour for 3 hours as it freezes and give it a good beating, folding in the crushed digestives – if using – before the ice cream is set solid.

Like the recipe says, you can fold crushed digestives into the ice cream, making a crispy buiscuit swirl. Or you can serve th ice cream sandwiched between two buiscuits, crumble them on top or serve them on the side. Or I guess you can leave them out totally, but I wouldn’t. Digestives and cheesecake belong together. You can’t have a proper cheesecake without, and therefore no cheesecake ice cream either. You need those buiscuits for the ultimate cheesecake-ice cream experience. Have I made myself clear? Good.
Off you go! Make some ice cream!

The Cookie? really?

I’m not dead! BUT – my computer died on me, and I’ve been busy reading for my exams, so my blogging activity has been pretty lame. But that’s all in the past, now, right?

Because today I have cookies.
Some cookies I have been pr-e-tty exited about to be honest.
For various reasons:

1: I finally got to crack open my giant chocolate bar I bought at the airport in barcelona.
1 kg of pure dark 70% chocolate. Yes, 1 kg! I couldn’t resist that thing, it was coming home with me. Oh, how I love big food. It kinda turns me on…

2: Browned butter. I’ve heard this stuff transforms ordinar cookies into something quite out of the ordinary – and that’s what my eternal cookie quest is all about! Extraordinary cookies!

3: Chilling the dough. I always skip chilling parts in recipes, and I’ve never ever had the willpower or patience to chill (and not eat) the dough. And not having cookies either. But I believe in this. All good food gets better with time – or not all, but a lot of food gets better if you give it time to develope the flavours.

I mean, how can this possibly fail?
I searched the internet widely before finally deciding on the recipe. But these three steps were mentioned in so many “best chocolate chip cookies”-recipes, there had to be some truth to it. Quality chocolate – check! Chilling the dough – Check! And browned butter – Check! I even caramelized and roasted the nuts. Jeez. Those cookies better be good I tell you!

It was a tough battle between recipes, it came down to three, but I finally chose this one from SugarPlum.

Yield: 50 cookies
(Do feel free to half the recipe – how can anyone have 50 cookies around? Not me! And I also replaced walnuts with hazelnuts. I love hazelnuts and chocolate. That’s me.)

Ingredients:
2 tablespoons unsalted butter
1/4 cup granulated sugar
1/2 teaspoon ground sea salt
1 1/2 cups coarsely chopped walnuts, lightly toasted

1 cup unsalted butter
4 1/2 cups all-purpose flour
2 1/2 teaspoons baking soda
2 teaspoons ground sea salt, plus additional for sprinkling
1/2 cup unsalted butter, softened
2 cups firmly packed brown sugar
1 cup granulated sugar
4 large eggs
4 teaspoons vanilla extract
12 ounces coarsely chopped dark chocolate

Directions:
Preheat oven to 200 C/375 F.

Melt 2 tablespoons butter in a small saucepan over medium heat; stir in 1/4 cup sugar and 1/2 teaspoon salt and bring to a boil. Boil 1-2 minutes, whisking frequently, until golden brown; stir in walnuts until well coated. Place on a sheet pan, and bake for 5 minutes or until well toasted; cool.

Melt 1 cup butter in a small saucepan over medium heat; continue to cook the butter, whisking frequently, until it starts to brown and foam, about 5-7 minutes. Set aside.

In a medium sized mixing bowl, sift together flour and baking soda; stir in 2 teaspoons salt until combined.

In a large mixing bowl, using a mixer on medium speed, beat 1/2 cup softened butter, brown sugar and 1 cup granulated sugar until well combined and grainy, about 1 minute; beat in browned butter for 1 additional minute. Beat in eggs and vanilla until well combined. Reduce mixer speed to low and gradually beat in flour mixture until just combined; stir in chocolate and walnuts with a wooden spoon until combined. Chill dough in the refrigerator for 1 hour. (You could speed up this process by placing the dough in the freezer for about 45 minutes.)

Drop 1/4 cup measures of dough onto cookie sheet, forming into large mounds, and flatten slightly. Bake at 375 degrees F. for 12-14 minutes, or until golden brown around edges. Cool 2 minutes before transferring to wire racks.

So….the result. The verdict. The bottom line. The reward for beeing able to let the dough chill in the fridge for several days. (Though some of it strangely may have found its way into my mouth.)
Well, actually I’m a little bit disappointed. Not because the cookies were bad or anything, I just didn’t really notice the big-O-difference. With the browned butter, chilled dough and all. Maybe I didn’t brown it thoroughly enough. Maybe I overchilled the dough? But I thought letting it rest for long was a good thing. Or maybe my expectations simply were too high. They tasted delicious either way. A real crunchy outer crust and a chewy center – packed with chunky pieces of dark quality chocolate. I mean, that’s never wrong. Not in my book. But I’m left with a feeling I did something wrong, or missed out on something. I just don’t know what. I guess I just have to work on it. Practise my browning butter skills. Bake another sheet of cookies for a shorter time. I can start that rightaway, cause I froze most of the dough, so I can have fresh cookies at any time. Ahh, Bree van De Kamp would be so proud. My idol. But still. So many people can’t be mistaking and raving about this cookie for nothing, right? Any experiences out there? I want to get this right! Better roll oup the sleeves again, I guess! This cookie buisness is rough.